Classic Piña Colada Recipe
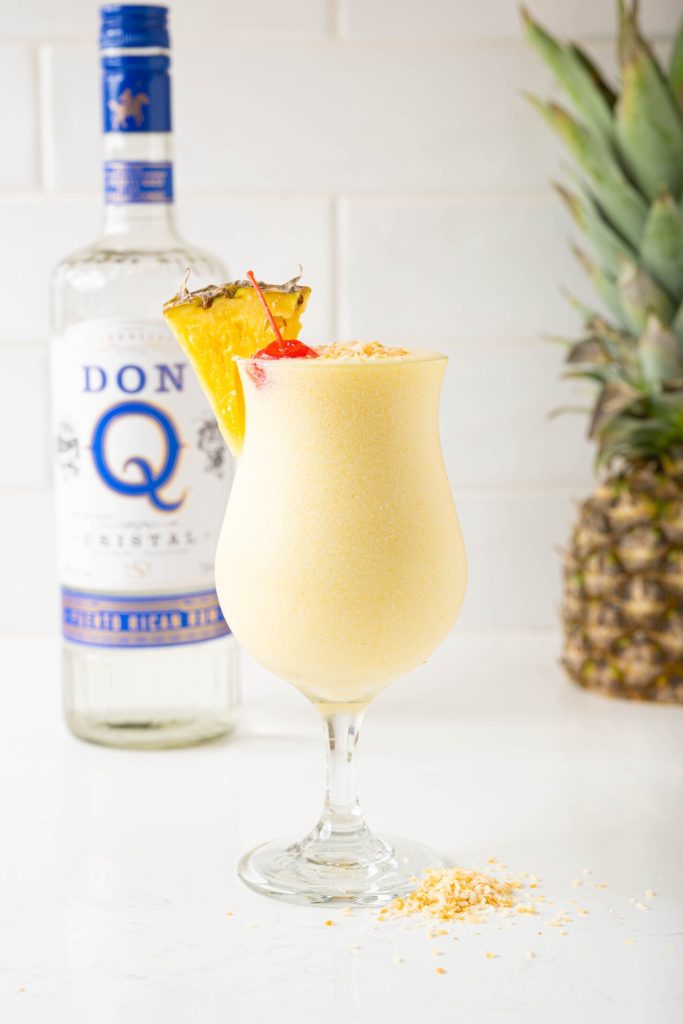
This traditional piña colada recipe is rich, well-balanced, and simple to whip up at home with basic ingredients! Ideal for summer gatherings, poolside relaxation, or whenever you’re in the mood for a tropical beverage.
Sipping a piña colada gives you a vacation vibe, even when you’re just relaxing at home. Many piña coladas are excessively sweet with only a trace of rum. However, I discovered that the authentic recipe for this timeless cocktail offers a flawless harmony among the pineapple juice, cream of coconut, and aged rum.
So, here’s how to prepare a piña colada—the original way! As a cocktail aficionado who has created over 300 cocktail recipes, I can never grow weary of this drink. Because who wouldn’t enjoy a delightful piña colada?
Reasons to Adore This Piña Colada Recipe
This piña colada recipe is a beloved classic; here’s why you’ll appreciate it:
– Authentic tropical cocktail taste: It boasts a genuine coconut flavor from cream of coconut combined with real pineapple.
– Perfect sweetness balance: It’s not overly sweet like many versions from restaurants.
– Creamy, slushy consistency: The frozen pineapple pieces provide the perfect texture.
– Quick preparation: It only takes 5 minutes to prepare!
5 Star Reader Feedback
⭐⭐⭐⭐⭐ “This recipe is so fantastic that it became my Super Bowl drink for my guests. Everyone enjoyed it as much as I did, especially my daughter, who’s hard to please lol. Seriously though, thanks a ton for sharing my new go-to recipe.” -Mary
⭐⭐⭐⭐⭐ “By far the best recipe ever, thank you so much for keeping it traditional!” -Giardino
Essential Ingredients
The secret to this piña colada recipe lies in selecting high-quality ingredients. Here’s what you’ll require and the importance of each:
– Frozen pineapple chunks: I prefer frozen pineapple chunks over fresh because they create a lovely thick, slushy consistency. They’re also more economical than fresh.
– Pineapple juice: Opt for 100% juice with no added sugar (since the cream of coconut already adds sweetness).
– Cream of coconut: This is essential: you need cream of coconut (like Coco Lopez), not coconut cream or coconut milk. Cream of coconut is sweetened and specifically made for coconut cocktails. Coconut cream is unsweetened, and coconut milk is too watery.
– Aged rum: While many mixologists use white rum for piña coladas, I prefer aged rum for its richer flavor, with hints of vanilla and caramel. However, white rum is a good substitute if that’s what you have.
– Lime juice: Fresh lime juice is crucial for enhancing brightness.
– Ice cubes: Regular ice cubes combined with the frozen pineapple yield the slushy texture.
Steps to Prepare a Piña Colada
The piña colada is one of those blended drinks that can be made in minutes. Here’s how to do it:
1. Place the frozen pineapple chunks and ice cubes into the blender. Pulse a few times to break them into smaller pieces. Then add the rum, cream of coconut, pineapple juice, and lime juice.
2. Blend at high speed until completely smooth and creamy. Aim for a thick, slushy consistency akin to a milkshake. If it’s too thick, pour in a bit more pineapple juice. If it’s too thin, add a few more ice cubes and blend again.
Pro Tip: If possible, ensure all your ingredients are chilled before blending. This helps prevent the drink from melting too fast once served.
Variations to Explore
– Virgin Piña Colada: For a non-alcoholic version, simply blend frozen pineapple, maple syrup, and coconut milk. I enjoy this version!
– Less sweet option: Decrease the cream of coconut to 1 ½ ounces.
– Extra thick version: Try my frozen piña colada that incorporates coconut milk for a smoothie-like texture. It’s almost similar to a piña colada smoothie, but with rum.
Presentation & Garnishing Suggestions
The classic garnish for a piña colada consists of a pineapple wedge and a maraschino cherry. To make it a bit more festive, add drink umbrellas!
A few additional ideas: you could rim the glass with toasted coconut. Just wet the rim with lime juice and dip it in shredded coconut that you have lightly toasted in a dry skillet.
You can serve a piña colada at pool parties, backyard BBQs, or tropical-themed dinners, but I often find myself longing for them in winter! They pair wonderfully with grilled shrimp or fish tacos. If you’re making a batch of drinks, consider pairing with Mai Tais or even a delicious Bushwacker.
Tip: If you enjoy this drink, you can also try a Chi Chi (vodka piña colada) or a Painkiller (with orange juice).
Common Questions
– What can I substitute for cream of coconut? If you don’t have cream of coconut

Recipe for Heart-Shaped Cookies
# Enhance Your Valentine’s Day with Vibrant and Whimsical Heart Cookies
Valentine’s Day is the ideal moment to showcase your love and fondness, and there’s no better method than with charming heart-shaped cookies. These tender, buttery sugar cookies are not only appealing to the eye but also delectably sweet, making them a perfect indulgence for cherished ones. Inspired by the traditional Conversation Hearts, these cookies boast colorful royal icing and affectionate messages, ensuring they bring joy to anyone who tastes them.
## Recipe Ingredients
To whip up these delightful Heart Cookies, you’ll require the following components:
– **Food Coloring**: To mimic the classic hues of the conversation heart sweets.
– **Almond Extract**: Infuses a subtle almond taste that makes these cookies melt in your mouth.
– **Confectioner’s Sugar**: The foundation for the sweet and silky royal icing.
For a detailed list of ingredients and their quantities, check the recipe card below.
## How to Create Heart Cookies
### Step 1: Prepare the Dry Ingredients
In a medium bowl, combine the flour and baking powder and whisk until blended.
### Step 2: Cream Butter and Sugar
In a large bowl, mix the butter and sugar together on high speed for 3 minutes until light and airy.
### Step 3: Introduce Wet Ingredients
Then, incorporate the egg, vanilla, and almond extract, beating on high for 1 minute. Scrape down the sides as required.
### Step 4: Combine Ingredients
Mix the dry ingredients into the wet ingredients until a dough is formed.
### Step 5: Roll Out the Dough
Split the dough into two portions and roll each portion out on lightly floured parchment paper until approximately ¼ inch thick.
### Step 6: Chill the Dough
Put the rolled dough on a baking sheet and refrigerate for 1 hour.
### Step 7: Preheat the Oven
After chilling, preheat your oven to 350 degrees Fahrenheit and line your baking sheets with parchment paper or silicone mats.
### Step 8: Cut Out Hearts
Take the chilled dough from the fridge and use a 3.5-inch heart cookie cutter to shape the dough into hearts. Re-roll the scraps and keep cutting until all dough is utilized. Chill again if the dough gets too sticky.
### Step 9: Bake the Cookies
Arrange the cut-out cookies on your lined baking sheets and bake in the oven for 10-12 minutes until the edges are slightly browned. Allow the cookies to cool completely before decorating.
### Step 10: Prepare the Royal Icing
While the cookies cool, prepare the royal icing. In a large bowl using a hand mixer, beat the confectioner’s sugar, meringue powder, and water until combined.
### Step 11: Color the Icing
Divide the icing into six bowls—five larger for the heart colors and one smaller for writing. Tint each bowl to your desired shades and transfer each into a piping bag. Use a piping tip #4 for the heart colors, outline each cookie, and fill the inside until smooth.
### Step 12: Allow the Icing to Set
Allow the cookies to rest for 1-2 hours before writing on them.
### Step 13: Write Messages
Transfer the red icing into a piping bag fitted with a round piping tip #2 and inscribe your chosen words onto the cookies. The writing will require 1-2 hours to set.
### Step 14: Serve and Delight
At last, present your vibrant heart cookies and relish the joy they bring!
## Expert Tips
– **Cookie Dough Consistency**: If the dough is too sticky, incorporate another tablespoon of flour until you achieve the desired consistency.
– **Chilling the Dough**: Refrigerate the dough after each re-roll to simplify the process.
– **Royal Icing**: If the icing appears too runny, add more powdered sugar until it thickens. The red icing for writing should be thicker to maintain its shape better.
## FAQs
**Can I prepare these heart cookies in advance?**
Absolutely! These heart cookies can be made a week ahead and will still taste fresh.
**Is it necessary to cut these cookies into heart shapes?**
Not at all. You can use any shape you prefer, but adjust the baking time if using smaller cutters.
**Can I stack these heart cookies?**
Certainly, once completely dried, you can stack them with parchment paper in between.
## Storage Information
Keep any leftover cookies in an airtight container at room temperature for up to a week. Do not refrigerate them as this may soften the cookies and alter their texture. For longer storage, wrap them in plastic wrap and store them in an airtight container in the freezer for up to two months.
Enhance your Valentine’s Day with these vibrant and whimsical heart cookies, and spread the love to those around you!
Recipe for a Passion Fruit Martini Drink
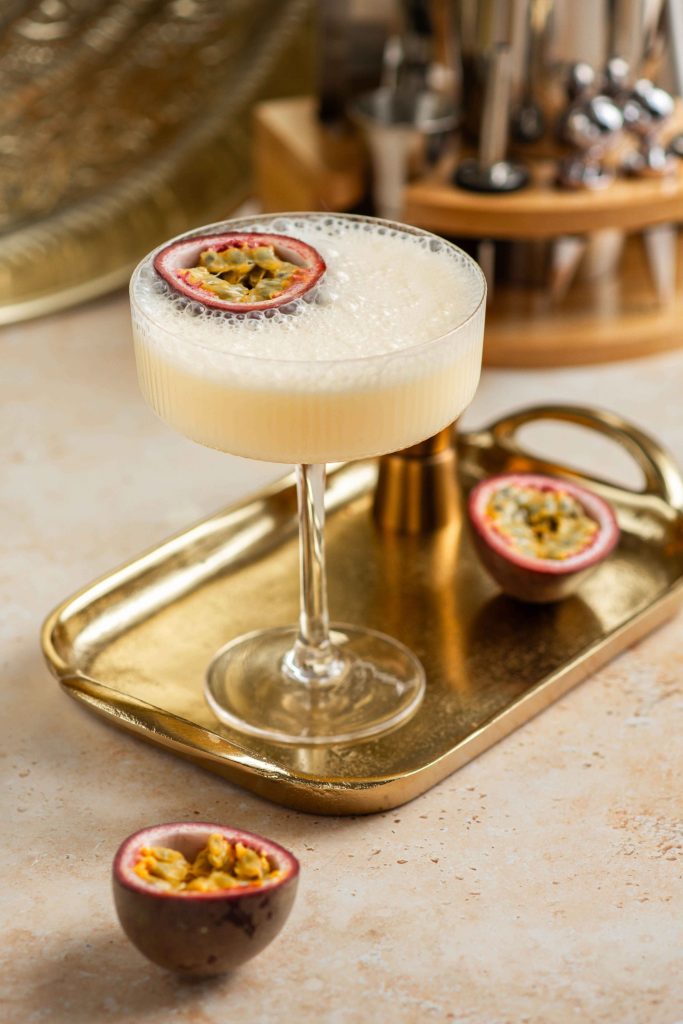
# Delight in This Playful and Fruity Passion Fruit Martini Recipe
This passion fruit martini is a vibrant and exotic drink that delivers a splash of tropical taste to any event. Crafted with smooth vodka, zesty passion fruit purée, and a hint of simple syrup and lemon juice, it’s both invigorating and luxurious.
## Why We Adore This Passion Fruit Martini
– It’s a straightforward recipe that incorporates uncomplicated ingredients and authentic fruit puree.
– It requires just 5 minutes to prepare and can significantly enhance a date night or social gathering.
– This martini and its fruity notes are enjoyable to pour and savor from your favorite martini glasses.
## Recipe Components
– **Vodka** – Standard vodka serves as the foundation for this classic martini. You may also opt for gin if you favor it over vodka.
– **Passion Fruit Puree** – Rich puree that provides this beverage with the finest overall passion fruit flavor.
– **Simple Syrup** – The uncomplicated sugar syrup introduces a touch of sweetness to this mixture.
– **Lemon Juice** – To infuse a bit of citrus. If lemon juice isn’t available, lime juice, pineapple juice, or even fresh passion fruit juice can be used as substitutes.
For a complete list of components and quantities, refer to the recipe card below.
## How to Prepare a Passion Fruit Martini
**Step #1:** Fill a cocktail shaker with ice.
**Step #2:** Incorporate the vodka, passion fruit puree, simple syrup, and lemon juice.
**Step #3:** Shake energetically for 30 seconds.
**Step #4:** Pour into your preferred martini glass, adorn with a slice of passion fruit, and relish!
## FAQs
**What alternative spirits can I use in this passion fruit martini?**
If vodka isn’t your preference, gin is an excellent substitute, as well as prosecco. For a stronger passion fruit flavor, you could also swap in a passion fruit liqueur, like Passoa.
**Can I prepare a pitcher of these passion fruit martinis?**
Absolutely! You can adjust the servings in the recipe card for the number of martinis you wish to create, and the quantities will modify accordingly.
## Storage Details
Any remaining passion fruit martini can be kept in your refrigerator for up to 1 day.
## More Tasty Cocktail Recipes to Explore
Savor this invigorating cocktail throughout the year and discover other exciting martini recipes to enhance your gatherings!

How to Prepare a Traditional Gin Fizz Cocktail
**Simple Syrup Substitute:**
In the realm of cocktail creation, simple syrup serves as a staple component for infusing sweetness without changing the drink’s texture. Yet, if you’re in search of a substitute, maple syrup stands out as a superb option. It imparts delicate caramel flavors to your cocktail, enriching the taste profile without overwhelming it with a strong maple flavor. This renders it a flexible alternative that pairs well with an array of spirits and mixers.
**Egg White Substitute:**
For individuals in search of a vegan substitute for egg whites in cocktails, aquafaba is widely favored. Sourced from the liquid in a chickpea can, 2 tablespoons of aquafaba can effectively replace one egg white, offering a comparable frothy consistency. Alternatively, the Fee Brothers Cocktail Foamer is available, specifically crafted to replicate the properties of egg whites in cocktails while avoiding animal ingredients.
**Foam Tips:**
To create the finest foam in your cocktails, utilizing fresh eggs is vital. Fresh eggs typically generate more stable and lush foam. Furthermore, during the dry shake phase—shaking the ingredients without ice—make sure to shake vigorously. This step is crucial for incorporating air and achieving that sought-after frothy texture.
**Gin Recommendations:**
When choosing gin for your cocktails, think about brands like Beefeater and Malfy. These options are recognized for their well-rounded botanical notes, which complement a range of gin-based beverages. It’s advisable to steer clear of excessively floral gins, like Tanqueray, as they can overshadow the cocktail’s flavor profile and may not mix as harmoniously with other components.
Four-Ingredient Dill Pickle Dip Recipe
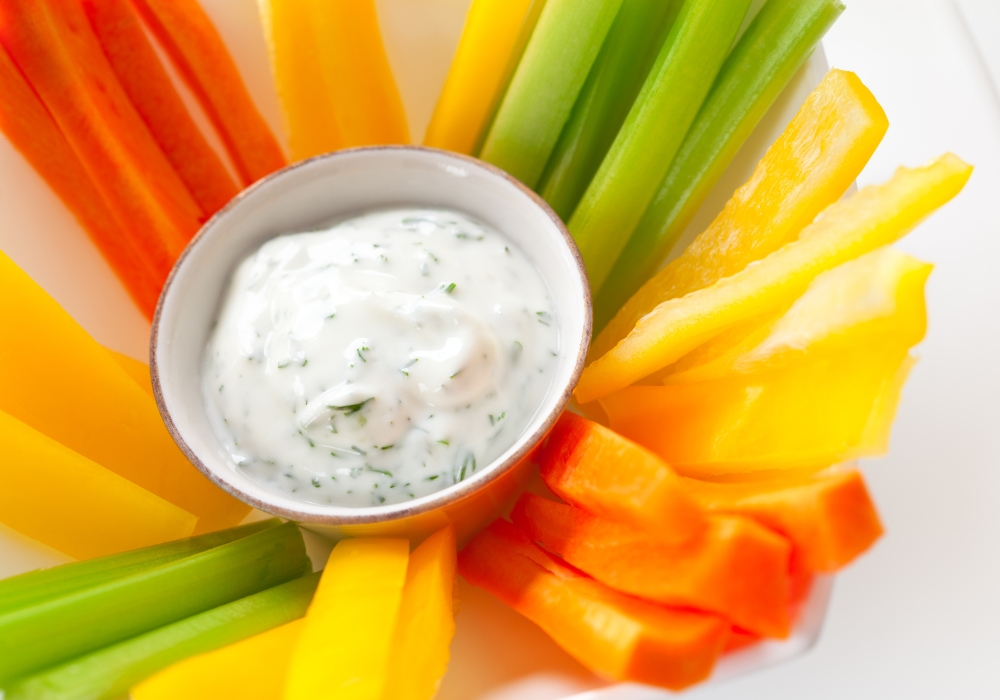
# Dill Pickle Dip: A Zesty Treat for Any Occasion
Dill pickle dip is a tasty and creamy starter that has become well-loved for its distinctive flavor and adaptability. This dip is ideal for celebrations, game events, or relaxed meet-ups, and complements a wide range of dippers such as veggies, chips, or crackers.
## Overview
– **Servings**: 12
– **Prep Time**: 5 minutes
– **Chill Time**: 30 minutes
– **Total Time**: 35 minutes
– **Rating**: 4.99 from 87 votes
## Ingredients
To prepare this scrumptious dill pickle dip, you will require the following ingredients:
– Cream cheese
– Pickle juice
– Chopped pickles
– Fresh dill
## Instructions
1. In a medium bowl, utilize a hand mixer to blend the cream cheese until it reaches a smooth texture.
2. Slowly incorporate pickle juice into the cream cheese, mixing thoroughly after every addition.
3. Fold in the chopped pickles and fresh dill until everything is evenly mixed.
4. Chill the dip for at least 30 minutes before serving to let the flavors meld together.
## Notes
– **Consistency**: Modify the quantity of pickle juice to reach your preferred dip thickness. The dip will become a bit thicker as it cools.
– **Pickle Juice**: Include any seasoning or garlic pieces from the pickle juice for an extra flavor kick.
– **Dill**: Although fresh dill is suggested for the finest flavor, you can swap in 1 teaspoon of dried dill weed if needed.
This recipe produces about 1.5 cups of dip, and it can be kept in the refrigerator for up to 10 days.
## Nutrition Information (per serving, 2 tablespoons)
– **Calories**: 99
– **Carbohydrates**: 1g
– **Protein**: 1g
– **Fat**: 9g
– **Saturated Fat**: 5g
– **Cholesterol**: 31mg
– **Sodium**: 218mg
– **Potassium**: 42mg
– **Vitamin A**: 390 IU
– **Calcium**: 29mg
– **Iron**: 0.1mg
## Course and Cuisine
– **Course**: Appetizer, Dip, Party Food
– **Cuisine**: American
Dill pickle dip is not only simple to whip up but also a favorite among guests that adds a tangy flair to your appetizer spread. Savor this delightful dip at your upcoming gathering!

Classic Piña Colada Recipe
This traditional piña colada recipe is rich, well-balanced, and simple to whip up at home with basic ingredients! Ideal for summer gatherings, poolside relaxation, or whenever you’re in the mood for a tropical beverage.
Sipping a piña colada gives you a vacation vibe, even when you’re just relaxing at home. Many piña coladas are excessively sweet with only a trace of rum. However, I discovered that the authentic recipe for this timeless cocktail offers a flawless harmony among the pineapple juice, cream of coconut, and aged rum.
So, here’s how to prepare a piña colada—the original way! As a cocktail aficionado who has created over 300 cocktail recipes, I can never grow weary of this drink. Because who wouldn’t enjoy a delightful piña colada?
Reasons to Adore This Piña Colada Recipe
This piña colada recipe is a beloved classic; here’s why you’ll appreciate it:
– Authentic tropical cocktail taste: It boasts a genuine coconut flavor from cream of coconut combined with real pineapple.
– Perfect sweetness balance: It’s not overly sweet like many versions from restaurants.
– Creamy, slushy consistency: The frozen pineapple pieces provide the perfect texture.
– Quick preparation: It only takes 5 minutes to prepare!
5 Star Reader Feedback
⭐⭐⭐⭐⭐ “This recipe is so fantastic that it became my Super Bowl drink for my guests. Everyone enjoyed it as much as I did, especially my daughter, who’s hard to please lol. Seriously though, thanks a ton for sharing my new go-to recipe.” -Mary
⭐⭐⭐⭐⭐ “By far the best recipe ever, thank you so much for keeping it traditional!” -Giardino
Essential Ingredients
The secret to this piña colada recipe lies in selecting high-quality ingredients. Here’s what you’ll require and the importance of each:
– Frozen pineapple chunks: I prefer frozen pineapple chunks over fresh because they create a lovely thick, slushy consistency. They’re also more economical than fresh.
– Pineapple juice: Opt for 100% juice with no added sugar (since the cream of coconut already adds sweetness).
– Cream of coconut: This is essential: you need cream of coconut (like Coco Lopez), not coconut cream or coconut milk. Cream of coconut is sweetened and specifically made for coconut cocktails. Coconut cream is unsweetened, and coconut milk is too watery.
– Aged rum: While many mixologists use white rum for piña coladas, I prefer aged rum for its richer flavor, with hints of vanilla and caramel. However, white rum is a good substitute if that’s what you have.
– Lime juice: Fresh lime juice is crucial for enhancing brightness.
– Ice cubes: Regular ice cubes combined with the frozen pineapple yield the slushy texture.
Steps to Prepare a Piña Colada
The piña colada is one of those blended drinks that can be made in minutes. Here’s how to do it:
1. Place the frozen pineapple chunks and ice cubes into the blender. Pulse a few times to break them into smaller pieces. Then add the rum, cream of coconut, pineapple juice, and lime juice.
2. Blend at high speed until completely smooth and creamy. Aim for a thick, slushy consistency akin to a milkshake. If it’s too thick, pour in a bit more pineapple juice. If it’s too thin, add a few more ice cubes and blend again.
Pro Tip: If possible, ensure all your ingredients are chilled before blending. This helps prevent the drink from melting too fast once served.
Variations to Explore
– Virgin Piña Colada: For a non-alcoholic version, simply blend frozen pineapple, maple syrup, and coconut milk. I enjoy this version!
– Less sweet option: Decrease the cream of coconut to 1 ½ ounces.
– Extra thick version: Try my frozen piña colada that incorporates coconut milk for a smoothie-like texture. It’s almost similar to a piña colada smoothie, but with rum.
Presentation & Garnishing Suggestions
The classic garnish for a piña colada consists of a pineapple wedge and a maraschino cherry. To make it a bit more festive, add drink umbrellas!
A few additional ideas: you could rim the glass with toasted coconut. Just wet the rim with lime juice and dip it in shredded coconut that you have lightly toasted in a dry skillet.
You can serve a piña colada at pool parties, backyard BBQs, or tropical-themed dinners, but I often find myself longing for them in winter! They pair wonderfully with grilled shrimp or fish tacos. If you’re making a batch of drinks, consider pairing with Mai Tais or even a delicious Bushwacker.
Tip: If you enjoy this drink, you can also try a Chi Chi (vodka piña colada) or a Painkiller (with orange juice).
Common Questions
– What can I substitute for cream of coconut? If you don’t have cream of coconut
Read More
Recipe for Heart-Shaped Cookies
# Enhance Your Valentine’s Day with Vibrant and Whimsical Heart Cookies
Valentine’s Day is the ideal moment to showcase your love and fondness, and there’s no better method than with charming heart-shaped cookies. These tender, buttery sugar cookies are not only appealing to the eye but also delectably sweet, making them a perfect indulgence for cherished ones. Inspired by the traditional Conversation Hearts, these cookies boast colorful royal icing and affectionate messages, ensuring they bring joy to anyone who tastes them.
## Recipe Ingredients
To whip up these delightful Heart Cookies, you’ll require the following components:
– **Food Coloring**: To mimic the classic hues of the conversation heart sweets.
– **Almond Extract**: Infuses a subtle almond taste that makes these cookies melt in your mouth.
– **Confectioner’s Sugar**: The foundation for the sweet and silky royal icing.
For a detailed list of ingredients and their quantities, check the recipe card below.
## How to Create Heart Cookies
### Step 1: Prepare the Dry Ingredients
In a medium bowl, combine the flour and baking powder and whisk until blended.
### Step 2: Cream Butter and Sugar
In a large bowl, mix the butter and sugar together on high speed for 3 minutes until light and airy.
### Step 3: Introduce Wet Ingredients
Then, incorporate the egg, vanilla, and almond extract, beating on high for 1 minute. Scrape down the sides as required.
### Step 4: Combine Ingredients
Mix the dry ingredients into the wet ingredients until a dough is formed.
### Step 5: Roll Out the Dough
Split the dough into two portions and roll each portion out on lightly floured parchment paper until approximately ¼ inch thick.
### Step 6: Chill the Dough
Put the rolled dough on a baking sheet and refrigerate for 1 hour.
### Step 7: Preheat the Oven
After chilling, preheat your oven to 350 degrees Fahrenheit and line your baking sheets with parchment paper or silicone mats.
### Step 8: Cut Out Hearts
Take the chilled dough from the fridge and use a 3.5-inch heart cookie cutter to shape the dough into hearts. Re-roll the scraps and keep cutting until all dough is utilized. Chill again if the dough gets too sticky.
### Step 9: Bake the Cookies
Arrange the cut-out cookies on your lined baking sheets and bake in the oven for 10-12 minutes until the edges are slightly browned. Allow the cookies to cool completely before decorating.
### Step 10: Prepare the Royal Icing
While the cookies cool, prepare the royal icing. In a large bowl using a hand mixer, beat the confectioner’s sugar, meringue powder, and water until combined.
### Step 11: Color the Icing
Divide the icing into six bowls—five larger for the heart colors and one smaller for writing. Tint each bowl to your desired shades and transfer each into a piping bag. Use a piping tip #4 for the heart colors, outline each cookie, and fill the inside until smooth.
### Step 12: Allow the Icing to Set
Allow the cookies to rest for 1-2 hours before writing on them.
### Step 13: Write Messages
Transfer the red icing into a piping bag fitted with a round piping tip #2 and inscribe your chosen words onto the cookies. The writing will require 1-2 hours to set.
### Step 14: Serve and Delight
At last, present your vibrant heart cookies and relish the joy they bring!
## Expert Tips
– **Cookie Dough Consistency**: If the dough is too sticky, incorporate another tablespoon of flour until you achieve the desired consistency.
– **Chilling the Dough**: Refrigerate the dough after each re-roll to simplify the process.
– **Royal Icing**: If the icing appears too runny, add more powdered sugar until it thickens. The red icing for writing should be thicker to maintain its shape better.
## FAQs
**Can I prepare these heart cookies in advance?**
Absolutely! These heart cookies can be made a week ahead and will still taste fresh.
**Is it necessary to cut these cookies into heart shapes?**
Not at all. You can use any shape you prefer, but adjust the baking time if using smaller cutters.
**Can I stack these heart cookies?**
Certainly, once completely dried, you can stack them with parchment paper in between.
## Storage Information
Keep any leftover cookies in an airtight container at room temperature for up to a week. Do not refrigerate them as this may soften the cookies and alter their texture. For longer storage, wrap them in plastic wrap and store them in an airtight container in the freezer for up to two months.
Enhance your Valentine’s Day with these vibrant and whimsical heart cookies, and spread the love to those around you!
Read More
Recipe for a Passion Fruit Martini Drink
# Delight in This Playful and Fruity Passion Fruit Martini Recipe
This passion fruit martini is a vibrant and exotic drink that delivers a splash of tropical taste to any event. Crafted with smooth vodka, zesty passion fruit purée, and a hint of simple syrup and lemon juice, it’s both invigorating and luxurious.
## Why We Adore This Passion Fruit Martini
– It’s a straightforward recipe that incorporates uncomplicated ingredients and authentic fruit puree.
– It requires just 5 minutes to prepare and can significantly enhance a date night or social gathering.
– This martini and its fruity notes are enjoyable to pour and savor from your favorite martini glasses.
## Recipe Components
– **Vodka** – Standard vodka serves as the foundation for this classic martini. You may also opt for gin if you favor it over vodka.
– **Passion Fruit Puree** – Rich puree that provides this beverage with the finest overall passion fruit flavor.
– **Simple Syrup** – The uncomplicated sugar syrup introduces a touch of sweetness to this mixture.
– **Lemon Juice** – To infuse a bit of citrus. If lemon juice isn’t available, lime juice, pineapple juice, or even fresh passion fruit juice can be used as substitutes.
For a complete list of components and quantities, refer to the recipe card below.
## How to Prepare a Passion Fruit Martini
**Step #1:** Fill a cocktail shaker with ice.
**Step #2:** Incorporate the vodka, passion fruit puree, simple syrup, and lemon juice.
**Step #3:** Shake energetically for 30 seconds.
**Step #4:** Pour into your preferred martini glass, adorn with a slice of passion fruit, and relish!
## FAQs
**What alternative spirits can I use in this passion fruit martini?**
If vodka isn’t your preference, gin is an excellent substitute, as well as prosecco. For a stronger passion fruit flavor, you could also swap in a passion fruit liqueur, like Passoa.
**Can I prepare a pitcher of these passion fruit martinis?**
Absolutely! You can adjust the servings in the recipe card for the number of martinis you wish to create, and the quantities will modify accordingly.
## Storage Details
Any remaining passion fruit martini can be kept in your refrigerator for up to 1 day.
## More Tasty Cocktail Recipes to Explore
Savor this invigorating cocktail throughout the year and discover other exciting martini recipes to enhance your gatherings!
Read More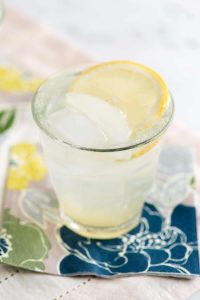
How to Prepare a Traditional Gin Fizz Cocktail
**Simple Syrup Substitute:**
In the realm of cocktail creation, simple syrup serves as a staple component for infusing sweetness without changing the drink’s texture. Yet, if you’re in search of a substitute, maple syrup stands out as a superb option. It imparts delicate caramel flavors to your cocktail, enriching the taste profile without overwhelming it with a strong maple flavor. This renders it a flexible alternative that pairs well with an array of spirits and mixers.
**Egg White Substitute:**
For individuals in search of a vegan substitute for egg whites in cocktails, aquafaba is widely favored. Sourced from the liquid in a chickpea can, 2 tablespoons of aquafaba can effectively replace one egg white, offering a comparable frothy consistency. Alternatively, the Fee Brothers Cocktail Foamer is available, specifically crafted to replicate the properties of egg whites in cocktails while avoiding animal ingredients.
**Foam Tips:**
To create the finest foam in your cocktails, utilizing fresh eggs is vital. Fresh eggs typically generate more stable and lush foam. Furthermore, during the dry shake phase—shaking the ingredients without ice—make sure to shake vigorously. This step is crucial for incorporating air and achieving that sought-after frothy texture.
**Gin Recommendations:**
When choosing gin for your cocktails, think about brands like Beefeater and Malfy. These options are recognized for their well-rounded botanical notes, which complement a range of gin-based beverages. It’s advisable to steer clear of excessively floral gins, like Tanqueray, as they can overshadow the cocktail’s flavor profile and may not mix as harmoniously with other components.
Read More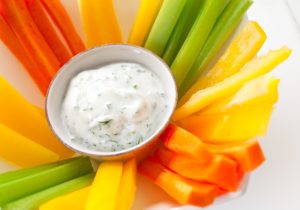
Four-Ingredient Dill Pickle Dip Recipe
# Dill Pickle Dip: A Zesty Treat for Any Occasion
Dill pickle dip is a tasty and creamy starter that has become well-loved for its distinctive flavor and adaptability. This dip is ideal for celebrations, game events, or relaxed meet-ups, and complements a wide range of dippers such as veggies, chips, or crackers.
## Overview
– **Servings**: 12
– **Prep Time**: 5 minutes
– **Chill Time**: 30 minutes
– **Total Time**: 35 minutes
– **Rating**: 4.99 from 87 votes
## Ingredients
To prepare this scrumptious dill pickle dip, you will require the following ingredients:
– Cream cheese
– Pickle juice
– Chopped pickles
– Fresh dill
## Instructions
1. In a medium bowl, utilize a hand mixer to blend the cream cheese until it reaches a smooth texture.
2. Slowly incorporate pickle juice into the cream cheese, mixing thoroughly after every addition.
3. Fold in the chopped pickles and fresh dill until everything is evenly mixed.
4. Chill the dip for at least 30 minutes before serving to let the flavors meld together.
## Notes
– **Consistency**: Modify the quantity of pickle juice to reach your preferred dip thickness. The dip will become a bit thicker as it cools.
– **Pickle Juice**: Include any seasoning or garlic pieces from the pickle juice for an extra flavor kick.
– **Dill**: Although fresh dill is suggested for the finest flavor, you can swap in 1 teaspoon of dried dill weed if needed.
This recipe produces about 1.5 cups of dip, and it can be kept in the refrigerator for up to 10 days.
## Nutrition Information (per serving, 2 tablespoons)
– **Calories**: 99
– **Carbohydrates**: 1g
– **Protein**: 1g
– **Fat**: 9g
– **Saturated Fat**: 5g
– **Cholesterol**: 31mg
– **Sodium**: 218mg
– **Potassium**: 42mg
– **Vitamin A**: 390 IU
– **Calcium**: 29mg
– **Iron**: 0.1mg
## Course and Cuisine
– **Course**: Appetizer, Dip, Party Food
– **Cuisine**: American
Dill pickle dip is not only simple to whip up but also a favorite among guests that adds a tangy flair to your appetizer spread. Savor this delightful dip at your upcoming gathering!
Read More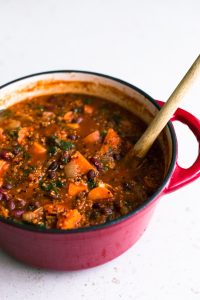
Easy and Fast Quinoa Chili Recipe
Alex & Sonja: The Culinary Partners Behind A Couple Cooks
Alex and Sonja Overhiser, the vibrant pair behind the beloved food blog A Couple Cooks, have been motivating home cooks since 2010. As authors of two celebrated cookbooks, busy parents, and a couple who share a love for cooking, they have established a platform that honors the pleasure of making simple, seasonal dishes.
Their adventure started with a mutual passion for food and the ambition to make cooking a fun and accessible activity for all. Throughout the years, Alex and Sonja have created thousands of unique recipes that accommodate a range of tastes and dietary needs. From quick weekday meals to sumptuous weekend gatherings, their recipes aim to unite people around the dining table.
A distinguishing feature of A Couple Cooks is the personal element that Alex and Sonja infuse into their content. Each recipe is carefully constructed, composed, and photographed by the couple, guaranteeing that their audience receives not just tasty meals but also aesthetically pleasing presentations. Their children frequently act as the ultimate taste testers, adding an additional layer of authenticity to their culinary endeavors.
In addition to recipes, A Couple Cooks provides a wealth of cooking tips and meal planning strategies. Alex and Sonja recognize the difficulties of managing busy lives while maintaining a desire for healthy meals, and they offer practical solutions to assist their readers in achieving this balance. Whether it’s guidance on pantry stocking, strategies for effective meal preparation, or recommendations for seasonal produce, they arm their audience with the necessary tools for kitchen success.
Through their blog, cookbooks, and social media presence, Alex and Sonja have fostered a community of food lovers who share their enthusiasm for cooking. Their approachable demeanor and authentic passion render them relatable figures in the culinary realm, and their commitment to excellence and innovation continues to motivate home cooks worldwide.
In a society where convenience often overshadows quality, Alex and Sonja Overhiser remind us of the basic joys of cooking and the significant effect it can have on our lives. With A Couple Cooks, they encourage us to slow down, relish each moment, and discover the delight of crafting delicious meals with affection.
Read More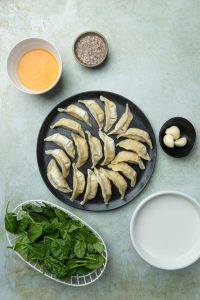
Viral Dumpling Bake Recipe from TikTok
# The Ultimate One-Pan Dinner: Trending Dumpling Bake from TikTok
The trending dumpling bake from TikTok has captured the attention of food lovers across the web with its ease and tastiness. This one-pan meal features succulent dumplings in a creamy, sweet-and-spicy sauce, making it the ideal dish to serve over rice.
## What is the Trending Dumpling Bake?
The trending dumpling bake is a simple meal that merges frozen dumplings, usually gyoza or potstickers, with a luscious sauce crafted from coconut milk and red curry paste. The dish is prepared in an ovenproof dish, allowing the dumplings to bake until they’re tender and juicy on the base, with a lightly crispy surface. The sauce thickens during cooking, resulting in a rich and flavorful layer for the dumplings.
## Origins of the Trending Dumpling Bake Phenomenon
Although it’s difficult to identify the exact source of viral recipes, the dumpling bake phenomenon is attributed to Danielle Brown of Healthy Girl Kitchen, who highlighted the dish on TikTok. Since its appearance, it has surged in popularity, motivating numerous home cooks to create this delightful meal.
## Ingredients for Trending Dumpling Bake
1. **Dumplings**: Frozen dumplings work best for this recipe, as they save preparation time. Seek out potstickers or gyoza at your nearby grocery shop.
2. **Red Curry Paste**: This component imparts complexity and heat to the dish. You can find it in the Asian food section of most supermarkets.
3. **Coconut Milk**: A can of coconut milk adds richness and smoothness to the sauce.
4. **Aromatics**: Fresh ginger and garlic amplify the flavor, but they can be omitted if you’re pressed for time.
5. **Toppings**: Optional toppings such as cilantro, green onions, sesame seeds, and chili crisp enhance the dish and provide visual flair.
## Selecting the Right Pan
For the trending dumpling bake, choose a pan that allows the dumplings to be partially submerged in the sauce. A 9×9-inch casserole dish, an 11×7-inch rectangle, or a 12-inch oval or round pan is suitable.
## Best Frozen Dumplings
The finest frozen dumplings for this recipe are gyoza or potstickers, which generally feature thinner wrappers that crisp up beautifully in the oven. Local Asian grocery stores have a diverse selection, but well-known brands like MìLà and Lao Ban can also be found in major grocery outlets.
## How to Prepare the Trending Dumpling Bake
1. **Prep**: Preheat your oven to 375°F. Mince the garlic and grate the ginger.
2. **Assemble**: In a baking dish, blend together coconut milk, red curry paste, garlic, and ginger. Incorporate leafy greens and mix until coated. Place the frozen dumplings in the sauce.
3. **Bake**: Cover the dish and bake for approximately 20 minutes, until the dumplings are thoroughly cooked and the sauce thickens. Remove the cover in the last 5 minutes for added browning.
4. **Top**: Garnish with cilantro, green onions, sesame oil, and chili crisp.
5. **Enjoy**: Serve hot, either standalone or over rice or noodles.
## What to Accompany the Trending Dumpling Bake
Steamed rice complements the saucy dumplings perfectly, creating a comforting meal. For a well-rounded feast, consider including a light cucumber salad or other side dishes.
This trending dumpling bake is more than just a fad; it’s a delightful and effortless meal that brings warmth and comfort to the dining experience. Whether you’re a supporter of viral recipes or merely in search of a cozy dinner idea, this dish is guaranteed to please.
Read More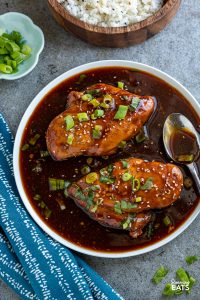
Simple Slow Cooker Chicken Teriyaki Recipe
### Slow Cooker Chicken Teriyaki
**Prep Time**: 10 minutes
**Cook Time**: 8 hours 10 minutes
**Total Time**: 8 hours 20 minutes
**Servings**: 4
#### Summary
Teriyaki chicken that’s as effortless as tossing all the ingredients into the slow cooker in the morning, and it’s ready in just 5 minutes of work when you arrive home in the evening!
#### Ingredients
– 1 pound boneless, skinless chicken breasts or thighs
– 1 onion, sliced or diced
– 1 tablespoon minced or grated garlic
– 1 tablespoon minced or grated ginger
– 2 tablespoons soy sauce (gluten-free if needed)
– 2 tablespoons sake (optional)
– 2 tablespoons mirin (optional)
– 2 tablespoons sugar
– 1 tablespoon rice vinegar (optional)
– 1/2 cup water (or chicken broth)
– 2 tablespoons water
– 1 tablespoon cornstarch
– 1 teaspoon toasted sesame oil (optional)
– 1 tablespoon toasted sesame seeds (optional)
– 4 green onions, sliced thinly (optional)
#### Directions
1. In a slow cooker, combine the chicken and onion, then pour the mixture of garlic, ginger, soy sauce, sake, mirin, sugar, vinegar, and water over them. Cook on LOW for 8-10 hours or on HIGH for 3-4 hours.
2. Take the chicken out and shred it.
3. Transfer the liquid and remaining components from the slow cooker into a saucepan, add the blend of the 2 tablespoons of water and the cornstarch, bring to a boil, reduce heat, and let it simmer until the sauce thickens, about 3-5 minutes.
4. Combine the chicken, sauce, sesame oil, sesame seeds, and green onions and savor!
#### Options
– Substitute sugar with brown sugar, maple syrup, honey, etc.
– Incorporate vegetables!
#### Nutrition Facts
– Calories: 180
– Fat: 5g (Saturated 0.8g, Trans 0)
– Cholesterol: 82mg
– Sodium: 496mg
– Carbs: 14g (Fiber 1g, Sugars 7g)
– Protein: 27g
Nutrition by: [Edamam](https://www.edamam.com/)
Read More
How to Prepare Shrimp Cocktail: A Detailed Recipe Guide
# Shrimp Cocktail: A Classic Indulgence
Shrimp cocktail, referred to as prawn cocktail in the UK, is a timeless starter that has recently regained its popularity. This dish showcases succulent, well-cooked shrimp served cold, frequently paired with a tangy cocktail sauce. Its sentimental charm and delectable taste make it a preferred choice for many, bringing back memories of stylish gatherings and festive celebrations.
## The Revival of Shrimp Cocktail
Lately, shrimp cocktail has been reappearing on restaurant menus, highlighting its enduring charm. Whether savored at a trendy bistro or crafted at home, shrimp cocktail continues to be a favored option for seafood enthusiasts. The dish is adaptable, varying from sophisticated presentations in fine dining to relaxed servings at social events.
## What Constitutes Shrimp Cocktail?
Essentially, shrimp cocktail comprises cooked and shelled shrimp served alongside a dipping sauce. In North America, shrimp is generally matched with cocktail sauce, while in Europe, it is commonly accompanied by Marie Rose sauce, a creamy mixture of mayonnaise and ketchup with a touch of seasoning.
## Double the Taste
For those who appreciate variety, preparing shrimp cocktail with both cocktail sauce and Marie Rose sauce can be an enjoyable avenue to sample different flavors. This offers a delightful tasting experience and an opportunity for friendly discussions over which sauce is superior.
## How to Prepare Shrimp Cocktail
### Ingredients:
– 1 lb large shrimp (with shells)
– Kosher salt (to preference)
– 1/2 onion
– 1 stalk celery (halved)
– 3 cloves garlic (smashed)
– 1 bay leaf
– 1/2 cup ketchup
– 2 tbsp chili sauce
– 2 tbsp horseradish sauce
– 1 tsp sugar
– 1 lemon (zested and juiced)
– Freshly ground pepper (to preference)
### Instructions:
1. **Thaw and Peel the Shrimp**: If utilizing frozen shrimp, defrost them in cold water. After thawing, peel the shrimp, keeping the tails intact for presentation.
2. **Chill and Plump the Shrimp**: Mix the peeled shrimp with salt and a touch of baking soda. Refrigerate for approximately 15 minutes to improve texture.
3. **Create the Poaching Liquid**: In a pot, combine shrimp shells, onion, celery, garlic, and bay leaf. Fill with water and simmer for 15-20 minutes. Strain and discard solids.
4. **Cook the Shrimp**: Rinse the shrimp and introduce them to the simmering poaching liquid. Cook until they become pink and opaque.
5. **Chill the Cooked Shrimp**: Use a slotted spoon to remove shrimp and lay them on a plate to cool in the refrigerator.
6. **Prepare the Sauce**: In a bowl, combine ketchup, chili sauce, horseradish, sugar, lemon juice, and zest. Adjust seasoning with salt and pepper.
7. **Serve**: Present chilled shrimp on a platter with cocktail sauce and lemon wedges.
## What is Shrimp Cocktail Sauce?
In North America, cocktail sauce is generally a mix of ketchup, horseradish, and various seasonings, leading to a tangy and mildly spicy dip. Conversely, Marie Rose sauce, favored in Europe, blends mayonnaise, ketchup, Worcestershire sauce, and lemon juice for a creamy side.
## Selecting the Ideal Shrimp
For shrimp cocktail, larger shrimp are preferred. Sizes like 16/20 (16 to 20 shrimp per pound) offer a substantial bite. Smaller varieties, such as 26/30, may also suffice but might lack the same effect.
## How to Thaw Shrimp
1. **Overnight Method**: Place frozen shrimp in the refrigerator the night before.
2. **Quick Method**: Soak shrimp in cold water for about 15 minutes until thawed.
## Serving Ideas
Though shrimp cocktail is customarily served as a starter, it can be appreciated at any occasion. Think about offering it during brunch, festive gatherings, or as a cool snack.
## Cooking Shrimp Precisely
To obtain perfectly cooked shrimp, refrain from overcooking. The shrimp should change from gray and translucent to pink and opaque, signaling they are finished. Cooking in a gently simmering broth adds flavor without compromising texture.
## Tails On or Off?
Keeping the tails on shrimp can enhance presentation and provide a handy grip for dipping. However, if you opt to serve them tail-free, offer cocktail forks for convenient enjoyment.
## Deveining Shrimp Without Splitting
To maintain the visual appeal of shrimp, utilize tweezers or a toothpick to extract the vein without splitting the shrimp. This technique preserves the shrimp’s shape while ensuring they are clean and ready to serve.
Shrimp cocktail is a delightful appetizer that merges simplicity with sophistication. Whether relished at an upscale dinner or a laid-back gathering, it captivates the palate.
Read More
Creamy Green Pasta Recipe Made in One Pot
### The Emergence of TikTok Pasta and Fast Recipes
In the last few years, social media platforms such as TikTok have transformed the way we find and share recipes. A viral phenomenon that has enchanted the hearts (and appetites) of many is the “TikTok pasta,” which consists of a wonderful mix of baked feta cheese and cherry tomatoes, mashed into a creamy sauce that perfectly envelops your preferred pasta. This dish not only demonstrates the influence of social media on cooking trends but also emphasizes the joy of cooking together as a family.
#### A Touching Cooking Journey
Observing a child take charge in the kitchen can be one of the most fulfilling moments for a parent. Recently, Elsa crafted the TikTok pasta entirely on her own, creating a moment brimming with pride and happiness. This experience reminds us that at times, the impact of social media can excel beyond conventional teaching techniques, as children become motivated by the engaging and visually stimulating content they find online.
#### The Charm of Quick and Simple Pasta Recipes
The popularity of quick and simple pasta recipes is clear, catering to hectic lifestyles while still producing delectable results. Apart from the viral TikTok pasta, there are countless other easy pasta dishes that can be prepared in no time. One such recipe features kale, making it an ideal choice for lunch, particularly when aiming to incorporate some greens.
#### Creamy Kale Pasta Recipe
This creamy kale pasta meal can be made in less than 15 minutes and requires few ingredients and minimal kitchen tools. Here’s how to prepare it:
**Ingredients:**
– Bucatini pasta (or your choice of pasta)
– Fresh kale
– Olive oil
– Garlic
– Parmesan cheese
– Salt and pepper
– Optional: nuts or seeds for extra texture
**Instructions:**
1. **Cook the Pasta:** Start by boiling water in a big pot. Add the bucatini pasta and cook according to the packaging directions.
2. **Soften the Kale:** In the last minute of cooking the pasta, add the kale to the pot. This will tenderize the kale and infuse the pasta water with flavor.
3. **Blend the Sauce:** Save a cup of pasta water, then drain the pasta and kale. In a blender, mix the cooked kale, olive oil, garlic, Parmesan cheese, and a splash of the saved pasta water. Blend until smooth, adjusting the thickness with additional pasta water if needed.
4. **Combine:** Mix the pasta with half of the kale sauce, ensuring it’s evenly covered. Serve the remaining sauce at the bottom of the dishes for an impressive presentation.
5. **Garnish:** Finish with extra Parmesan cheese, nuts, or seeds for added crunch.
This meal not only looks stunning but also provides a creamy texture that is sure to delight. The use of bucatini, with its thicker and hollow shape, allows it to absorb the sauce wonderfully, enhancing the overall taste.
#### Join the Cookalong
For those eager to try this recipe, a cookalong event will be hosted on Instagram stories. Participants are encouraged to gather the ingredients and join in on the fun. Sharing your adaptations on social media and tagging the host can foster a sense of community and inspire others to attempt this delightful meal.
In summary, the effect of platforms like TikTok on culinary trends is unmistakable. Quick and convenient recipes not only make cooking more accessible but also promote family togetherness in the kitchen. So, whether you’re motivated by viral trends or classic cookbooks, there’s always a chance for creativity and enjoyment in cooking.
Read More